Showing posts with label supplies. Show all posts

Thursday, January 23, 2014

When the TUMS and Prilosec are Gone: Dealing with heartburn after SHTF

I have been dealing with some serious heartburn for a few days so I thought that it is only appropriate for the first P.R.E.P. blog post to be about heartburn. I'm don't think I have ever read anything about post-SHTF heartburn.


Heartburn is easily one of the most annoying feelings we can experience as humans. The pain is just enough to hurt for most and chronic for some people. Heartburn can disrupt sleep and be rather distracting and there are plenty of SHTF scenarios that this can cause bigger problems. Sleep and awareness are vital to your survivability and anything that inhibits these must be nipped in the butt. Heartburn is caused by stomach acid backing up into the esophagus. My personal opinion is that heartburn rates will take a staggering drop post-SHTF simply because the highly acidic soda's that we, as Americans, have been drinking for so long will run in short supply in no time.

Antacids would be a great addition to anyone's preps. They are cheap, effective, and they don't take up much space. I'm not going to harp on antacids to much. There isn't much to say about them except, get some and add them to your supplies. I am going to focus more on natural remedies for heartburn in this post. We need to know what to do when the antacids, and medication in general, run out. This post is rather short. There hasn't been much research into natural remedies for heartburn.

In my research I couldn't find any herbal remedies to help with heartburn that seemed promising. Calcium, B vitamins, and folic acid are helpful. Calcium can help with instant relief and has some preventative qualities. B vitamins and folic acid help on the the preventative side of things. Ginger also helps by giving instant relief. One of the easiest ways to relieve heartburn is to make your mouth produce excess saliva. Saliva works to neutralize stomach acid. Chewing gum, mustard and mustard seed, celery, and almonds all cause the body to produce more saliva. They make your drool. Vinegar also helps create lots of saliva.
I truly believe that a more natural post-SHTF diet will greatly help with heartburn but go ahead and stock up on antacids. Also, if we have to live through a dreaded SHTF scenario humankind will have to be tougher. If your heartburn isn't disrupting your survivability save your antacids and remedies. You may need them more later.
Comment Form is loading comments...

Sunday, February 12, 2012

Building Your Food Stores Without Going Broke

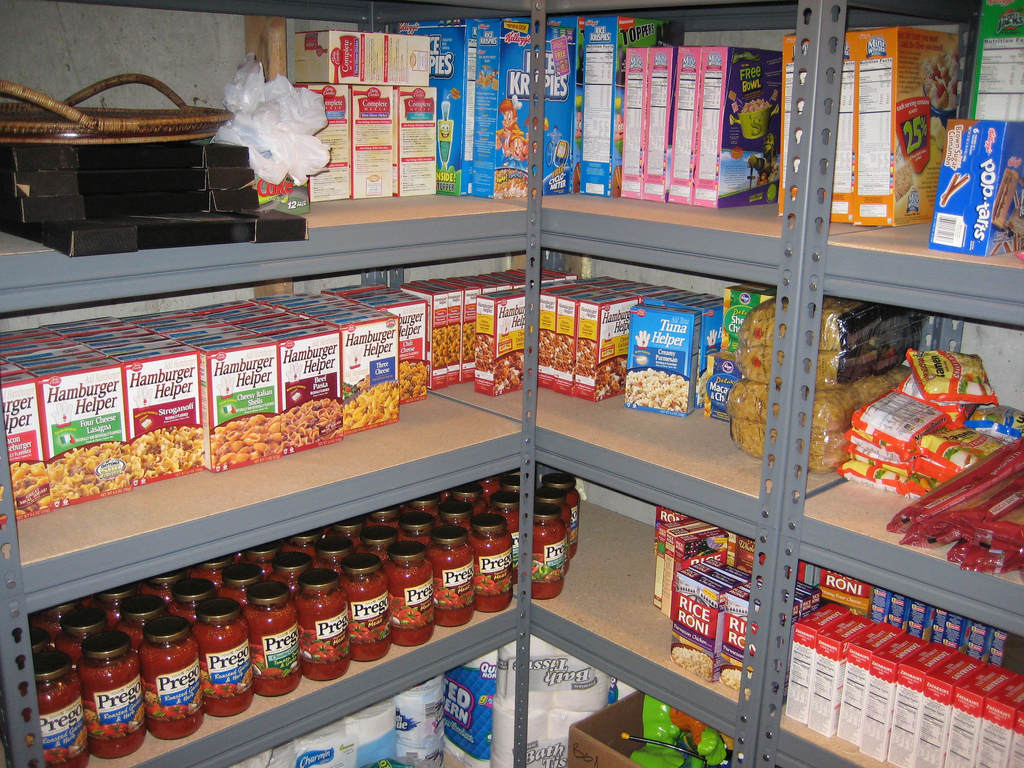
Today I want to touch on the topic of food storage. Food and water storage needs to be a staple in any preppers lifestyle.  The general rule of thumb is that you need 25 lbs of grains like rice, wheat, corn, etc for each person per month you are prepping for. On that same scale you will need 5 lbs of dry beans. For example. if you are prepping for 3 months for a family of four you need 300 lbs or grains and 60 lbs of beans. You also need 1 gallon of water per each per for everyday. I will discuss water storage in another post. These are very general rules.. I'm sure you can imagine how expensive prepping can get if your buy all of your food at once. They is hope for those of thus that don't have a whole lot of extra cash laying around.
First of all, you NEED a 72 hour kit. Go ahead and shell out the cash to get that kit in place. If disaster strikes tomorrow, and it WILL for someone, you will be glad you did. Now that the 72 hour kit is in place just set it aside. That kit does not count toward your food stores. To start on your food stores you need to go look in your pantry. Make a list of what types of canned goods you keep at home. This list is going to be the basis of you food preps. Any time you go into the grocery store you are going to but a bag of dried beans and a bag of rice. Those are only a buck or two each. You are also going to buy three canned goods from you list. You are out $5-$7 and you have already increased your survivability by a few points. Be sure to mix up the types of beans and canned goods you buy so you have a little variety. Pretty simple, right?

You want to build up at least 3 months of food and water stores as quickly as you can but I suggest just taking inventory once monthly or bi-monthly. Progress will seem slow is you recalculate every time you add to your stores. Storing food preps is not a daunting task but it sure can seem to be sometimes. One way to save a lot of money is to get more bang for your buck. Use coupons! You will get more product for less money, in turn your food stores will grow exponentially faster. Buy one get one free offers on canned goods are like a guaranteed win lottery ticket to preppers.

Once you have built up your three months of food stores you should consider preserving your own food too. Canning is is great way to preserve some good food. Canned meat will be like gold when the SHTF! You can can almost anything including pre-made meals. I love to can molle chicken with green salsa. It goes great over all of that rice you have stored up.

Once you have a nice stockpile you can start using it as you own grocery store. If you take one can of green beans just be sure to replace it with two when you find that by one get one free offer. Doing this helps to rotate your stock as well. I just hope that any of you that are reading my blog don't think SHTF survival will be like a Man vs. Wild episode. You need to store food. Wildlife populations will quickly be depleted by the unprepared if we are cut off from the support of our society for only a few days. Primitive survival skills are great but we are not looking for rescue helicopters when the SHTF! Get you 72 hour kit and set it aside. Start on your preps and look at your progress in a month. You won't be so nervous come December of 2012. It is in the back of all of our minds........"What if they are right."


Saturday, February 11, 2012

An overlooked item for your BOB...Pedialyte

I can scour the internet all day and look at suggestions for items that should be included in a bug out bag and never get bored. No list is exactly correct because a bug out bag is a very individual thing. There are a few items that should be in all bog out bags though. One item that is ofter overlooked is Pedialyte. That stuff is a like a magical potion for hydration. Just try some next time your hung over :).

Many add Gatorade to their kit to use for emergency hydration but Pedialyte should replace that used space. Pedialyte has much more potassium and a significantly less sugar than Gatorade. Sugar can make dehydrating diarrhea worse when your body is sucking up any hydration it can get. Pedialyte has been designed from the ground up simply to rehydrate when you need it the most. I see the container as a bonus too. When the contents run out you have a water bottle. If your feel that the Pedialyte bottle is too bulky if you have a smaller BOB then there is another option. Pedialyte comes in powder form as well. You can get it in singles packages which are much easier to carry. Put a few of those in your first-aid kits.   

Hydration is the single most important factor in your survivability. In a dire situation a simple stomach virus can kill you. It would behoove any prepper to take my advice and add this wonder fluid to your preps. I keep short barrels stocked with kits in my garage and each barrel will have a bottle and a singles pack in it by the time this week it over. The singles need to be in your EDC (Every Day Carry) kit too. Pickle juice is also another super hydrator but is much less practical to stock.

Get your Pedialyte because when you have to bug out of your home because the zombies are taking over you will need to emergency hydrate at some point. Besides, how are you going to put some lead in a zed head when your are suffering from the effects of dehydration. Dehydration is a quick way to become a zombie and zombies will be met with by carbine. Don't be on the wrong end of someone's gun just because you forgot your Pedialyte.


Thursday, February 2, 2012

Diabetes Prep: What Every Diabetic Needs To Know

Below is an article from the Radical Survivalism Webzine. I found it too important not to share. Be sure to connect with Radical Survivalism through the links on their site, http://radicalsurvivalism.com/web/. 

_______________________________________________________

Diabetes Prep: What Every Diabetic Needs To Know


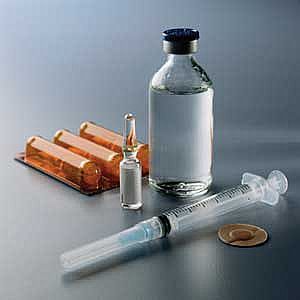
One segment of the population that is extremely vulnerable in a disaster is those who have insulin dependent diabetes. One thing that was gravely concerning in William Forschen’s book “One Second After” was the prominence diabetes was given in the plot with an apparent lack of research into this disease. Hopefully, this information will give some comfort and inspiration to those who live with this disease as well as those who reside with individuals or meet those who face these specific set of medical challenges.
Diabetics fall into two main categories. Type I diabetics produce no insulin at all in the body and are completely dependent upon manufactured insulin. Such people often develop diabetic symptoms in infancy or childhood. Type II diabetes produce insulin but it is either not enough or the body’s ability to use it is impaired. These people are usually diagnosed in middle age. Sadly, due to obesity and bad nutritional habits, adolescents are now being found to have this type of diabetes, too. Type II diabetics can sometimes control blood sugar levels with diet. They often need medications that improve insulin production. Many do use manufactured insulin to achieve the best control.
There have been many advances in treatment for diabetics in recent years, especially for those who depend upon insulin. Insulin may be injected with a syringe or delivered by a continuous pump. Currently, researchers are working to develop an insulin spray that can be inhaled through the nose and also a pill. Surgical options are also being researched.
For now, we have the problems of storing and handling manufactured insulin. Most insulin now in use is synthetic human insulin as opposed to the older insulins that were processed from pork or beef pancreas. There are various brand names and formulations. There are short and rapid acting insulins that are used at mealtime and if the blood sugar is very high that rapidly peaks in the body and is metabolized away. Very long acting (basal) insulins are released slowly over 12 to 24 hours providing a constant baseline insulin level and blood sugar control. Often, these two types are paired together for best control. There are also intermediate acting insulins which are usually taken in the morning and have their peak action 6 to 8 hours later that some patients benefit from. These are also usually combined with the short or rapid acting insulin.
Consequently, most insulin dependent diabetics will have two different insulins. In an emergency, other brands from the same group (short, long, intermediate) can be interchanged with only minor difficulties. If only one of the three categories is available, dosage adjustments may be needed. In a local or regional disaster such as hurricane, there are generally health providers available to assist with this. In a situation where such help is not available, dosage adjustments will need to be approached very carefully and in slow increments. A glucometer should be stored in a shielded container (Faraday cage) as well as extra batteries and test strips. Most Type I diabetics are fairly aware of how their body feels when blood sugar is up or down. Trust these feelings especially when testing is not available.
A useful strategy for Type I diabetics is “carb counting.” Many use this method to determine what their mealtime insulin dose should be. With the popularity of Low Carb Diets for weight loss, books are easily now available that provide the carbohydrate values for foods. This type of insulin dosing may require adjustment, but many diabetics feel it is worthwhile because it frees them to eat a wider variety of foods without anxiety. The “diabetic” category of foods is no longer necessary in diabetic treatment. This can make it much easier to plan your food storage. Diabetics can eat the same wholesome foods as others. It should be noted that diabetics have more reason than others to avoid large amounts of concentrated sweets and overly processed foods.
Storage of insulin is the next issue of concern. Most people believe that insulin must be refrigerated at all times. This is outdated information. Once a bottle of insulin or (insulin pen) is opened it should be stored at reasonable room temperature (59 to 86 degrees F). The manufacturer provides information regarding how long the insulin maintains potency after opening. For most insulins that is about thirty days. After that, the potency gradually deteriorates. If you had no choice but to continue using it, you would likely need more to maintain control as time went by. Refrigerating it makes no difference to this deterioration of open insulin. Insulin that freezes is generally not useable, it clumps. If your only insulin supply is exposed to temperatures above 85 degrees (F) it’s potency will degrade but it can be used safely.
Unopened insulin is best stored in a refrigerator. If you are able to prepare an alternate power source such as generator or solar array, this would be the preferred way to store insulin. If you don’t have this ability, a cool place underground area such as a root cellar is best. Even a place in your basement, protected from light will do. The temperature at depths of about four to twenty feet are constant at 50 to 55 degrees (F). “Refrigerature temperature” as defined by insulin manufacturers is up to 49 degrees (F). This difference of a few degrees between cellar and refrigerator temperatures will not cause the insulin to degrade at an extremely accelerated rate as portrayed in fiction.
Unfortunately, these measures will only carry you for a period of time. Type II diabetics are not likely to experience severe symptoms of high blood sugar. Some may even be cured of it with the weight loss likely to occur in a longer term disaster situation. Most of the consequences of Type II diabetes develop slowly due to the constant high blood sugar. Some of these are: decreased resistance to disease, eyesight deterioration to blindness, kidney failure, as well as sores on the feet and legs that may become infected resulting in sepsis.
Deprived of insulin completely, Type I diabetics may quickly become comatose and die. The only hope for these particular individuals is that some kind of order can be restored before supplies run out. The more supplies you have and the better your storage arrangements, the longer those with diabetes will live and be healthy. Insulin is one of the first supplies brought into disaster areas. Although we avoid depending on others, stockpiles of a relatively fragile necessity such as insulin are finite. We must do the best we can and hope that we can hold on for long enough.
Another type of diabetes we should plan for is Gestational Diabetes. This is high blood sugar levels during pregnancy in a woman who did not have diabetes prior to pregnancy. This type of diabetes usually ends when the baby is born. The main problem with this is that the baby is essentially ‘overfed’ while in utero by the high circulating blood glucose. This produces a larger than normal baby which is immature in its physical development. There is an increased probability of premature birth. Even if full-term, the baby may have under developed lungs which can cause significant challenges for the newborn or death if hospital care is unavailable. The large size of the baby presents an obvious problem for home birth.
Gestational diabetes most commonly occurs in women who have a family member with diabetes, are overweight, or over thirty. Women with this condition can be given insulin but not the currently available diabetes pills as the pills will harm the fetus. Gestational diabetes can often be controlled with diet. Since screening would be difficult in primitive conditions, all pregnant women should be cautious of diet during pregnancy. Do not use artificial sweeteners during pregnancy. Pregnant women will usually tolerate the higher blood sugar levels fairly well. Diabetic coma is highly unusual for pregnant women The greatest risk is primarily to the baby. For more information regarding Gestational diabetes testing, see below.
The biggest difficulty with insulin, as with any other prescription, is ability to stockpile. My first suggestion is to enroll in a 90 day supply option, now offered by most insurance plans often included with a mail in option. Refill as often as allowed, don’t wait until you run out. This can help with stocking up on medications such as asthma inhalers, too. If you are able to talk frankly with your doctor, explain that you would like to have a prescription for an extra supply to have on hand “just in case”. If you have prescription drug insurance, you will have to pay out of pocket for any extra supply. This is a small price to pay for peace of mind.
Information regarding Gestational diabetes testing with a glucometer:
Although glucometers are considered to be highly accurate, the test values may not conform exactly to the standards in use now because it would be difficult to measure an exact amount of grams of glucose being given. On the initial glucometer reading, fasting (eight to twelve hours without food or drink prior to test) blood sugar should be less than 100. One hour after drinking a sugary drink, such as a can of coke or big glass of orange juice, the reading should not be more than 200. By four hours after the test, the blood sugar reading should be back down to around 100. If the reading is abnormal, then the woman should be on a low carbohydrate, no concentrated sweets diet. Testing can be repeated to check if the adjustments in diet are helping to lower the blood sugar. Calories should be restricted enough to prevent the mother from gaining more than 35-40 pounds to try to keep the baby healthy and properly sized. Hopefully insulin will not be required since locating the drug during a disaster scenario could create even more serious challenges.


DISCLAIMER: Although this article has been written on a medical topic, no warranty whatsoever is made regarding the accuracy of the content. There is absolutely no assurance that any statement contained or cited in this article touching on medical matters is true, correct, precise, or up-to-date. Even when an accurate statement has been made about medicine, it may not apply to you or your symptoms.
The medical information provided here is, at best, of a general nature and cannot substitute for the advice of a medical professional. Neither the author of this article or the editors of Radical Survivalism Webzine are doctors. No one connected to Radical Survivalism Webzine can take any responsibility, or assume any liability, for the results or consequences of any attempt to use or adopt any of the information presented in this article. Further, nothing on RadicalSurvivalism.com should be construed as an attempt to offer or render a medical opinion, or otherwise engage in the practice of medicine.


PG
About The Author: Mama (Catherine) believes in preparedness as a way of life. Special emphasis on health as well as preparedness for women, families and communities. You can follow her on Twitter @MamasGotAGun.

Monday, October 24, 2011

Heavy-Duty Survival Kit for the Toughest Spots

I have never been one to give into novelty items that I think are cool when I see them on TV. I came across a nice little survival kit though from Gerber. It is part of their Bear Grylls series so my first thought was that is was all marketing for the all mighty dollar but then I actually paid attention to the product and it's pretty cool. I have not made it down to my local Sportsman's Warehouse to pick one up yet but Gerber makes good stuff so I trust that the quality is there and the content is quiet nice. This would make a great start for an Everyday Carry Bag (smallest of bug out bags). Just look...

The product of collaboration between Gerber and survival expert Bear Grylls, the Ultimate Kit is a 15-piece survival kit built for hostile environments. It fits in your pack and has everything you need--including Gerber's miniature multi-tool, a fire starter, a survival blanket, and a wire cutter--to survive even in the toughest spots.
Gerber and survival expert Bear Grylls Logo


Survival Series Ultimate Kit
At a Glance:

  • 15-piece survival kit built for hostile environments
  • Includes Gerber miniature multi-tool for a range of applications
  • Survival blanket, fire starter, snare wire, fishing and sewing kits, and more
  • Land to air rescue and SOS instructions
  • Comes with Bear Grylls' Priorities of Survival pocket guide
at a glance
Bear Grylls Survival Series Ultimate Kit - Open
The Ultimate Survival Kit has essential items for surviving outdoors. View larger.
Bear Grylls Survival Series Ultimate Kit -back side
Kit includes instructions for land, air, and SOS rescue techniques. View larger.
Bear Grylls and Gerber Team Up
The Ultimate Kit is part of the Gerber Bear Grylls Survival Series of gear. This collaboration brings together Gerber's 70+ years of knife and gear expertise with Bear Grylls' extensive outdoor survival and adventure experience to create a one-of-a-kind line of knives, tools, and gear.
From spending time in the British SAS, to scaling Mount Everest, Bear knows what it takes to be a survivor in extreme situations and multiple environments. Now he brings that knowledge to the creation of a range of items that help you make the most of your outdoor adventures.
Heavy-Duty Survival Kit for the Toughest Spots
Ideal for hard-core outdoor adventurers, the Ultimate Kit has everything you need to stay safe and alive until you can be rescued or rescue yourself.
The 15-piece kit includes the Gerber miniature multi-tool, which offers stainless steel, weather-resistant components including needle nose pliers, wire cutters, fine edge and serrated knives, a Phillips screwdriver, small and medium flat drivers, a lanyard ring, a bottle opener, and tweezers. This tool's rugged construction and external components make it a reliable multi-tasker, even in the harshest environments.

Bear Grylls' Pocket Survival Guide
Rugged, Ready-to-Go Tools and Accessories
In addition to the multi-tool, the Ultimate Kit comes with a lightweight ripstop nylon bag with a waterproof zipper for weather-resistant storage and an array of tools and accessories, including a miniature light, a hand saw, a signaling mirror, a survival blanket, a fire starter, waterproof matches, cotton ball fire tinder, a snare wire, an emergency cord, waxed thread, a fishing kit, and a sewing kit.
Includes Survival Guide and SOS Instructions
For added peace of mind and a higher level of preparedness, this kit comes with land to air rescue and SOS instructions. It also includes Bear Grylls' informative Priorities of Survival pocket guide, loaded with survival basics.
What's in the Box
Nylon pouch, multi-tool, miniature light, hand saw, signaling mirror, survival blanket, fire starter, waterproof matches, cotton ball fire tinder, snare wire, emergency cord, waxed thread, fishing kit, sewing kit, pocket survival guide, and rescue instructions.

Bear Grylls
From the highest peaks of the Himalayas, to the rainforests of South America, if world renowned outdoorsman Bear Grylls is on an adventure you can be sure he's equipped with the most durable outdoor gear Gerber has to offer.


From the Manufacturer

Gerber’s 31-000701 ultimate kit is a survival kit for hostile environments. Stick the ultimate kit in your backpack and hope you never have to use it. If you do, it has everything you will need to survive in even the toughest spots. This fifteen piece kit features a Gerber miniature multi-tool with needle nose pliers, wire cutters, fine edge knife, serrated knife, Phillips screwdriver, small flat driver, medium flat driver, lanyard ring, bottle opener, and tweezers. It comes in a water proof bag with miniature lights, hand saw, signaling mirror, survival blanket, fire starter, waterproof matches, cotton ball, fire tinder, snare wire, emergency cord, waxed thread, fishing kit, and sewing kit. It includes a lightweight, ripstop nylon bag with waterproof zipper, land to air rescue and SOS instructions, and the Priorities of Survival pocket guide containing Bear's survival essentials.


Sunday, October 16, 2011

REPOST: Prepping For College Students, Apartment Dwellers, And People In Tight Spaces

 I went back to the archives (very recent) for this; it is too important not to share again.


School in back in and the world is getting more chaotic by the day. Living on campus certainly presents some challenges for those of us who are of the prepper state of mind. I spent a few years in the dorms myself. There are lots of regulations and then there is the issues that arise from having a very limited amount of space. It is impossible to be as prepared as a man with 10 acres in the sticks if you are living in a dorm room but there are steps you can take to increase your survivability. This information can be useful for apartment dwellers as well. In the event of a disaster the biggest problem will be your fellow students. Let's face it, college students are generally idiots. They are generally less than half as smart as they think they are and have the skill level of a gnat when it comes to skills that increase survivability. These are the type of people that panic. It is best to keep our dorm room preps quite.

Here is a list of things that you can do to help with your preps while on campus. Keep in mind that this kit is only the essential. It is designed around limited storage space like a dorm room tends to have.
  • Hide $50-$100 in your room. Make sure half of it is in $1 bills.
  • Keep at least a half of a tank of gas in your vehicle. A campus is generally somewhere that you will want to bug out of if something happens.
  • Keep some hand sanitizer handy. A face mask would be a good idea too. Dorms are notorious for viral outbreaks. A serious pathogen can spread like wild fire in dorms.
  • No matter how sick you are of ramen noodles you need to have a small stock pile of them. 3600 Calorie ER Bars are great too.
  • As I always say, stash some Bic lighters
  • Make sure you have flashlights and batteries.
  • If your institution has a mass text service sign up for it.
  • Get a first aid kit
  • Make sure you have a couple of changes of clothes in you bug out bag.
  • Have three gallons of water on stand-by.
  • Make sure you have a knife. Just be sure that you are not breaking the rules. Most universities have a limit of an 8" blade length allowed on campus.
  • Very few colleges allow guns on campus. You can still be close to yours. Join a gym and lock your gun up in your gym locker.
  • Make sure you have your emergency documentation in your car and in your room. Don't forget to have your three routes to three different locations in there. Use printed maps. Your handy-dandy GPS might not work when you need it to.
  • Put all of these items in a bug out bag. You are basically creating a mini bug out kit.

The next thing a student needs to consider is when it is time to bug out or when bugging in is a better option. If riots break out in your college town it is probably time to get the hell out of town. If an ice storm hits it is time to bug in.  Just make sure you stay informed on the given situation and  stay ahead of the curve. If an infection is spreading throughout the cities and zombies are running rampant you need to bug out and do it before the infection hits your town. Information is key. Your goal is to hit the road before any one else in a bug out situation. People tend to panic a that they become the most dangerous threat of all. If you are at a campus that is far away from home you may want to find some fellow preppers that can help you with the area you are in. It is hard to bug out if you don't know where to go. I like to have three bug out location. One of them is 2 hours away from home, another is four hours away from home, and the third location is six hours away. I also have some local places to go in case a am hit by a very localized disaster that only affects my neighborhood.

How can I learn to increase my survivability?

  • Read Zombie Splatter on a regular basis. It is free and your can subscribe via RSS by clicking HERE. Or you can follow ZS by email with the box at the bottom of this page. Be sure to connect with us on facebook and twitter.
  • Start listening to The Survival Podcast. The listener feedback shows cover a lot of very important content
  • Make sure you have your emergency documentation. Click HERE for a template so you can make you documentation package.
  • Check out the ZS Bug Out Bag page to get a better understanding of what a full-sized bug out bag has in it.

I am very interested in your input on this post. If your a living in dorms what kind of input do you have. You can comment using the comment box just below. It is powered by facebook so just login in and leave your comment.


Saturday, September 10, 2011

Prepping For College Students, Apartment Dwellers, And People In Tight Spaces

School in back in and the world is getting more chaotic by the day. Living on campus certainly presents some challenges for those of us who are of the prepper state of mind. I spent a few years in the dorms myself. There are lots of regulations and then there is the issues that arise from having a very limited amount of space. It is impossible to be as prepared as a man with 10 acres in the sticks if you are living in a dorm room but there are steps you can take to increase your survivability. This information can be useful for apartment dwellers as well. In the event of a disaster the biggest problem will be your fellow students. Let's face it, college students are generally idiots. They are generally less than half as smart as they think they are and have the skill level of a gnat when it comes to skills that increase survivability. These are the type of people that panic. It is best to keep our dorm room preps quite.

Here is a list of things that you can do to help with your preps while on campus. Keep in mind that this kit is only the essential. It is designed around limited storage space like a dorm room tends to have.
  • Hide $50-$100 in your room. Make sure half of it is in $1 bills.
  • Keep at least a half of a tank of gas in your vehicle. A campus is generally somewhere that you will want to bug out of if something happens.
  • Keep some hand sanitizer handy. A face mask would be a good idea too. Dorms are notorious for viral outbreaks. A serious pathogen can spread like wild fire in dorms.
  • No matter how sick you are of ramen noodles you need to have a small stock pile of them. 3600 Calorie ER Bars are great too.
  • As I always say, stash some Bic lighters
  • Make sure you have flashlights and batteries.
  • If your institution has a mass text service sign up for it.
  • Get a first aid kit
  • Make sure you have a couple of changes of clothes in you bug out bag.
  • Have three gallons of water on stand-by.
  • Make sure you have a knife. Just be sure that you are not breaking the rules. Most universities have a limit of an 8" blade length allowed on campus.
  • Very few colleges allow guns on campus. You can still be close to yours. Join a gym and lock your gun up in your gym locker.
  • Make sure you have your emergency documentation in your car and in your room. Don't forget to have your three routes to three different locations in there. Use printed maps. Your handy-dandy GPS might not work when you need it to.
  • Put all of these items in a bug out bag. You are basically creating a mini bug out kit.

The next thing a student needs to consider is when it is time to bug out or when bugging in is a better option. If riots break out in your college town it is probably time to get the hell out of town. If an ice storm hits it is time to bug in.  Just make sure you stay informed on the given situation and  stay ahead of the curve. If an infection is spreading throughout the cities and zombies are running rampant you need to bug out and do it before the infection hits your town. Information is key. Your goal is to hit the road before any one else in a bug out situation. People tend to panic a that they become the most dangerous threat of all. If you are at a campus that is far away from home you may want to find some fellow preppers that can help you with the area you are in. It is hard to bug out if you don't know where to go. I like to have three bug out location. One of them is 2 hours away from home, another is four hours away from home, and the third location is six hours away. I also have some local places to go in case a am hit by a very localized disaster that only affects my neighborhood.

How can I learn to increase my survivability?

  • Read Zombie Splatter on a regular basis. It is free and your can subscribe via RSS by clicking HERE. Or you can follow ZS by email with the box at the bottom of this page. Be sure to connect with us on facebook and twitter.
  • Start listening to The Survival Podcast. The listener feedback shows cover a lot of very important content
  • Make sure you have your emergency documentation. Click HERE for a template so you can make you documentation package.
  • Check out the ZS Bug Out Bag page to get a better understanding of what a full-sized bug out bag has in it.

I am very interested in your input on this post. If your a living in dorms what kind of input do you have. You can comment using the comment box just below. It is powered by facebook so just login in and leave your comment.


Sunday, August 21, 2011

Building Your Food Bank Without Breaking The Bank

Any serious survivalist knows that food stockpiles are a key factor in your survivability. Primitive skills, the ability to create, grow, and kill your own food is great and the more you know the better. Stockpiles allow you to sustain yourself and your family for longer without struggling to replenish your supplies. Building a personal food bank can be very expensive, especially in a economy that only allows most people to buy what they need on a day to day basis. There is hope.

Couponing seems like something soccer moms should be doing while the kids are at school but it is not limited to them. We survivalists can greatly benefit from couponing and if we do it right our stockpiles can be built for next to nothing if not free. TLC's show Extreme Couponing shows the rare cases of extreme saving using coupons. It seems unreal and it basically is unrealistic unless you want to put in 40+ hours a week to cutting coupons and strategizing your shopping trips. This is where time becomes your friend. Use coupons to ass to your food bank a little at a time.

I found a great website to get you started. Couponing101.com has all of the information you need to know to begin couponing your way to a room full of food. The following was pulled directly from that site:


A Beginner’s Guide to Couponing

by Stephanie on January 6, 2009
Are you visiting after watching TLC’s “Extreme Couponing”? Please read this post first: Realistic Couponing. Be sure to sign up for FREE Email Updates so you never a miss a deal, freebie, or coupon!
Couponing 101: A Beginner’s Guide to Couponing

Get some coupons!
  • The Sunday newspaper is a great source of coupons. Buy the newspaper with the largest circulation in order to get the best coupons. You can sometimes get them cheaper by buying a double pack. I find that a good rule of thumb is to purchase one newspaper per family member.
  • Ask your friends and family for coupons. If they get a newspaper but usually throw out the coupons then they’ll probably be happy to give them to you.
  • Peruse the Internet. There are many great online printable coupons to be found! You can find a list of Internet printable sites here!
  • Use a clipping service. If there is a great coupon that you would like to have multiples of then you might consider ordering the coupons from a clipping service like The Coupon Clippers.
  • Check the store. There are many varieties of coupons that you can find in the store. See a list here.
Organize your coupons!
  • Envelopes. You can start by clipping and putting them all in an envelope or check file. But, once you’ve been couponing for a few weeks you will need something bigger.
  • File by insert. With this method you just file your inserts by date in a box and use an online coupon database to find the coupon you need. This method doesn’t require much work but you might miss out on unadvertised deals by not having all of your coupons with you at the store.
  • Coupon Binder. With this method you would clip all of your coupons and file them in baseball card holders in a three-ring binder. With this method you can carry your binder to the store and have all your coupons with you while you shop. You can see my coupon binder here!
Know your store’s coupon policy!
  • Loyalty Cards. If your store offers a loyalty card then make sure to get one. Some stores only give the sale prices to card-holders. Loyalty cards are Free!
  • Double/Triple coupons. Double/triple coupons is when the store will take your 50¢ coupon and double it making it $1. This is done automatically at the register, you do not have to do anything to take part in this promotion. First, find out if your store doubles/triples coupons. If they do then find out the maximum double/triple value and how many they will double/triple. My Albertson’s will triple up to 35¢ and double up to 50¢. That means my coupons that are 35¢ and under will triple and 50¢ and under coupons will double. So, at Albertson’s my 50¢ coupon is actually worth $1. And they will only double/triple the first four like coupons. So, if I have 10 coupons for 50¢ off of shampoo, only the first four will double.
  • Stacking coupons. Some stores will allow you to use one store coupon (the discount is provided by the store) and one manufacturer coupon (the discount is provided by the manufacturer) per item.
  • Internet coupons. Find out if your store accepts Internet coupons.
  • Competitor coupons. Some stores will accept competitors coupons.
  • Expired coupons. Some stores will accept expired coupons!
Make a plan!
  • Weekly Ads. Read the weekly store ads to see what is on sale and which stores have the best prices on the items you need. If you don’t get the weekly ads delivered you can usually view them on the store’s website.
  • Coupon Matchups. See if you can match coupons to the sale items to get an even better deal! Some websites do this for you. Couponing 101 provides weekly coupon matchups for CVS, Walgreens, Albertson’s, Brookshire’s, and Kroger.
  • Pricematch. Some stores, like Walmart, will pricematch. This means that if grapes are on sale for 99¢/lb at Kroger, you can take the ad to Walmart and at checkout tell the cashier that you would like to pricematch the grapes. Show them the ad and they will sell you the grapes for 99¢/lb versus their higher price.
  • Make a List! Don’t go to the store without a list. Lists remind you what you came for and keep you from buying items you don’t need.
  • Rainchecks. If your store is out of the sale item, get a raincheck! Go to customer service and ask for a raincheck for the item you wanted. They will fill out a piece of paper with the item details and price. Then you can come back another day (usually no more than 30 days) and buy that item at the sale price by giving the cashier the raincheck. This also gives you more time to gather coupons for the item! You can still use a coupon if you are using a raincheck.
Don’t be fooled!
  • 10/$10 promotions. You do not have to buy 10 items to get the $1 price! The only exception to this rule is if the ad states that you must! Those times are rare and are usually for items that are buy x get y free, final price 2/$5, etc.
  • Rock-bottom prices. Don’t go out and use your coupon immediately! If you use that 25¢ off toilet paper right away when it’s not on sale you aren’t reaching your saving potential! Wait until toilet paper goes on sale for $1 then use the coupon. If your store triples coupons then you could get the toilet paper for only 25¢! Matching sales with coupons is getting a great price. Combining sales plus coupons plus another promotion (rebates, double coupons, store coupons) is getting the best price!
  • “One per Purchase.” I’ve heard this so many times! Most coupons say “one coupon per purchase” somewhere in the fine print. Cashiers will try to tell you that that means you can only use one coupon per transaction/day. This is NOT true! One per purchase means that you can only use one coupon per item purchased! So if you are buying 10 items and have 10 coupons then you can use them all!
  • Leave the kids at home! Shopping with kids will distract you and cause you to buy items not on your list!
  • Make a Pricebook. Start paying attention to prices and keep a list of items you regularly buy with the best and regular prices for those items. This will help you when you see that canned veggies are on “sale” for 10/$10 but the regular price is actually 99¢!
  • Limits. Stores will sometimes put limits on the item to make you think it’s a great price! If cereal is just on sale 2/$4 you might not even notice it. But if it’s on sale 2/$4, limit 2! then you will likely think it’s a great price since they had to put a limit on it!
  • Shop early. If you have couponers in your area then it’s best to get to the store as early in the sale as you can!
  • “Bigger is better.” The cost per unit of the bigger box of cereal may be less than the smaller one but with coupons and sales the smaller box is likely a better deal.
  • Watch the cashier. When checking out pay close attention to the price screen to make sure everything rings up at the correct price. Also, make sure that the cashier scans all of your coupons. Coupons sometimes stick together or get dropped or the cashier will scan the coupon but not realize that it didn’t go through. Kindly point out that they missed one and they will correct it.
  • Check your receipt. BEFORE leaving the store look over your receipt to make sure everything rang up correctly and all of your coupons were scanned. If there is a problem take it to customer service immediately so they can fix it. If you leave the store and come back at another time then it might not be fixable. If the cashier missed a coupon and you notice right away it’s easy to see the mistake. But, if you come back later after several other coupons have been added to the cashier’s stack or the stack is gone then there is no way to prove that they missed a coupon.
Build your stockpile!
  • Start slowly. Don’t buy a ton of everything as soon as you get started or you will blow your budget! A stockpile takes time. Set aside a part of your weekly grocery money for stockpiling and do what you can with what you have.
  • Buy for the future. If an item goes on sale for a great price (or free!) then buy more than you need for just the week. Typically sales go in 12 week cycles so you only need to buy enough for 12 weeks. So, if you eat 1 box of cereal per week then when you find cereal at a rock-bottom price then you should buy 12 boxes. This way you have cheap cereal that will last you until you can buy it at a rock-bottom price again.
  • Know how much you use. Start paying attention to how many bottles of shampoo, packs of diapers, boxes of cereal, etc. you use. This will help you to have a better idea of how much you should buy and to not go overboard! If you only eat 1 box of cereal a month then there is really no need to buy more than a few boxes or they will just go to waste.
  • Donate it. Every couponer will eventually go overboard and buy too much of something. If there is no way you will use it before it expires then consider donating the item to a shelter or food pantry.


Sunday, July 24, 2011

Mylar can save your life

Mylar was developed in the 1950's as part of a project for NASA. It was used to make the balloons on the Echo Satellites launched in the 1960's. While it was developed for the space program it wasn't long until people started realizing it's true potential. Mylar is one of those products that just keep saying "I would be good at this." It has too many uses to list. Have you seem Space Blankets? They are made from Mylar. Since this is a survival based blog most of those uses don't need to be mentioned anyways. Mylar film has some excellent survival attributes, among them are:
1. Reflects existing light in a room to increase the total light from the source.
2. Helps indoor plant seedlings get more light by reflecting the grow lights or low sunlight.
3. Line solar ovens for faster cooking.
4. Increases outdoor plant growth in low light situations or when temperatures are low.
5. Can scare birds away from your seedlings or berries when they see their own reflections.
6. Could increase effectiveness of a solar dehydrator.
7. Mylar bags can be used for long term food storage
8. Mylar reflects a lot of heat which makes it ideal for a survival shelter construction.
9. ....and many more

Not only is Mylar great for retaining body heat. It is also great for protecting you from the sun in the form of a lean-to shade structure. Mylar it also moisture proof. Moisture will not seep through the film. That also makes it great for collecting water and rain water. You should add 2 Mylar blankets for each person in your home to each of you vehicles, bug out bags, 72 hour kits, survival kits, etc. There is no excuse not to. Mylar blankets are cheap and very compact.

I have never seen this but I have been told that you can start a fire with Mylar. You can line a bowl with Mylar, place some kindling in the center, and point it at the most direct sun rays. Like I stated before, I have never seem it. If you have see it done be sure to leave a comment in the comment box on the bottom of this page. If you have any other survival uses for Mylar, and there are many more, be sure to comment.

Thank you for reading Zombie Splatter: Helping you stay alive because tomorrow counts. Be sure to connect with us on Facebook and join our YouTube account. We will be posting some videos soon. While you at it share us with your friends too.


Sunday, July 17, 2011

The Bug Out Bag

 This is a copy of the Zombie Splatter BOB page. The page will be updated periodically.

Here is a list of supplies that should be included in you Bug Out Bag (from here known as BOB). You don't need the exact items listed, just something similar. A BOB, if your don't know, is a single bag with the items you need to survive for three days. A BOB should be very unique to the individual in whom it is designed to support. If a disaster strikes and you are going to a farm owned by the family a few hours away then you don't need to add the extra weight and bulk of some of the camping type items. My BOB has lots of camping type items since my plan includes a camp out in a mountain location until the "smoke clears." The contents of your bag greatly depends on you skill set. When designing you bag keep weight in mind!

The items listed below are linked to Amazon.com. They are my preferred items. If you have suggestions or comments please use the comment box at the bottom of this page to speak up.

The Bag

First Aid

Books

Clothing
  • Boots, socks, underwear, pants, socks, hat, poncho, etc

Cutting Tools

Water Containers
W
Water Purification

Camp Shovel

Radio

Flahlight

Fire Starting
Multi-tool

Navigation
Cordage

Documents and CASH

Communication
Emergency Food
Shelter

Hygiene
  • You preffered soap
  • This bag is intended for short term use, don't get shampoo. Just use soap for your hair.
  • Toothbrush
  • Toothpaste
  • Use the travel sized hygiene products, i don't have to list the items you need to stay clean.

Misc.

  • Fishing Gear
  • Medication
  • Signaling Devices
  • Solar Charger
  • REAL Duct Tape
  • Multivitamins
  • Firearm and ammunition
  • Feminine and baby products if necessary